
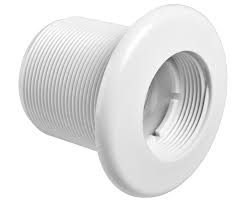
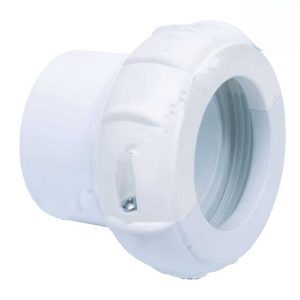
Hydroair Standard Nut White
£2.61 Inc VAT
100 in stock
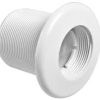
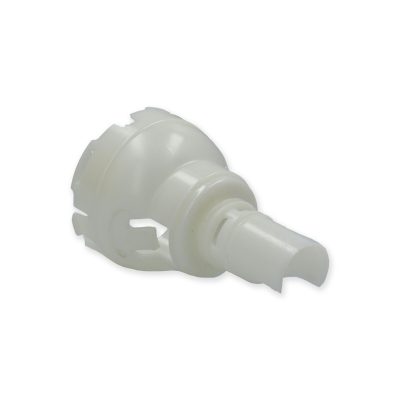
Hydroair Standard Nut – Essential Securing Component
As a retailer of hot tub spare parts, I’m offering this crucial Hydroair Standard nut, designed specifically for securing long wall fittings and suction assemblies. This component ensures reliable and watertight installation.
Product Overview
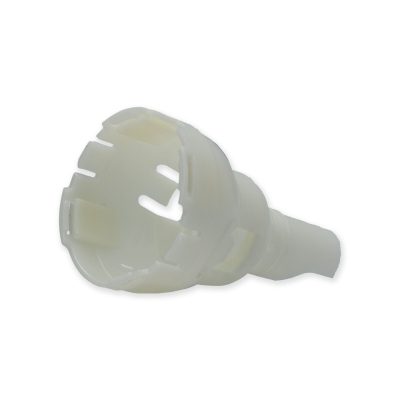
The Hydroair Standard Nut is a precision-engineered securing component that provides essential stability for Hydroair wall fittings. Its robust design ensures long-term reliability in spa installations.
Key Features
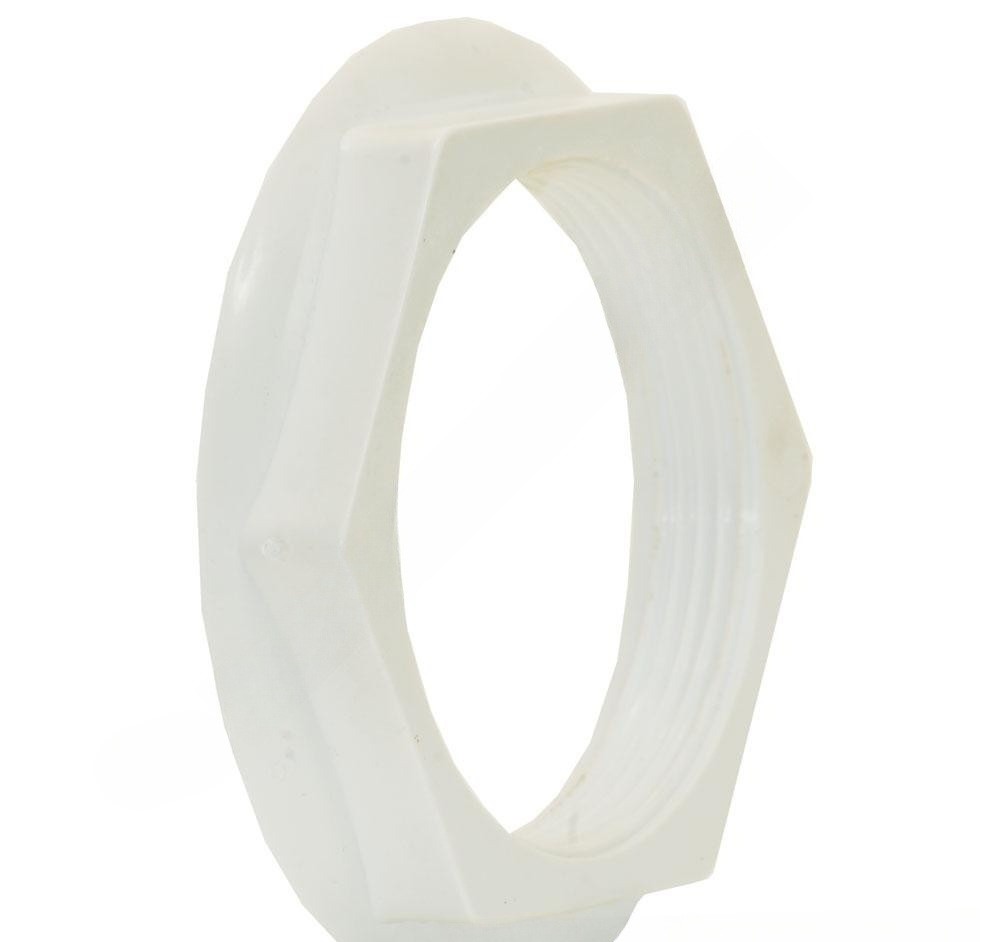
- Durable white finish
- Professional-grade construction
- Precise threading system
- Universal compatibility
- Extended service life
Technical Design
Engineered with specific dimensions to ensure proper fit and secure mounting of Hydroair long wall fittings and suction assemblies. The component provides consistent pressure distribution for reliable sealing.
Installation Specifications
Designed for professional integration with Hydroair fittings, providing secure retention and proper alignment.
Specifications Table
| Feature | Specification |
|---|---|
| Model Type | Standard Wall Fitting Nut |
| Manufacturer | Hydroair200 |
| Color | White |
| Internal Diameter | 84 mm |
| External Diameter | 60 mm |
| Depth | 10 mm |
| Primary Use | Wall Fitting Retention |
Applications
Essential for:
- Wall fitting installations
- Suction assembly mounting
- Spa system maintenance
- Professional installations
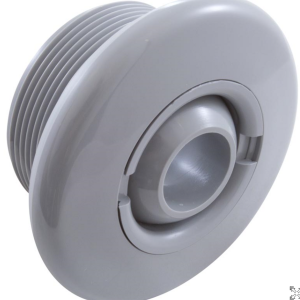
A Jet Explained
Hot tub jets serve the purpose of directing streams of water in various directions, and they are installed within the jet body that is securely fixed into your hot tub. These jets not only serve a functional role but also add an aesthetic touch, sometimes even bearing the mark of your spa brand, such as SUNDANCE® SPAS, Marquis, and DIMENSION ONE SPAS®.
How do Hot Tub Jets Work?
How Hot Tub Jets Operate Hot tub jets are known for their water-pushing prowess, creating a soothing massage experience. But have you ever wondered how they work? The inner workings of hot tub jets are closely tied to the fundamentals of hot tub plumbing.
Here's a breakdown of how hot tub jets function:
-
Suction and Water Flow:
- Water exits the hot tub through a suction line, with the suction force generated by the hot tub pump.
-
Filtration:
- The water proceeds through the pump into a filtration system, where it undergoes a cleaning process to remove debris and contaminants.
-
Heating:
- Filtered water is directed to the heater, where it passes over a heating element and gets warmed up.
-
Return to the Tub:
- After heating, the water re-enters the hot tub through the return line.
-
Jet Action:
- The water flows into the entrance of the hot tub jet, where the magic happens.
-
Venturi Effect:
- Inside the jet, there's an inner pipe that undergoes a unique transformation. It narrows and then widens again, resembling a sideways hourglass.
-
Physics at Play:
- This is where the Venturi effect comes into play. As water flows through the narrow middle portion of the inner pipe, its speed increases, while the pressure within the pipe decreases.
-
Mixing Air and Water:
- At the exit point of the jet, which is visible in the hot tub shell, water and air are simultaneously expelled from the jet into the hot tub.
-
Repeating the Process:
- The entire cycle repeats, ensuring a continuous flow of water and air for your enjoyment.
The pivotal moment in this process is the Venturi effect, where the hourglass-like shape of the inner pipe accelerates the water's speed while creating a pressure differential. As a result, the surrounding air, at higher pressure than the exiting water, is drawn into and mixed with the water stream, generating the beloved bubbly effect that enhances your hot tub experience.
Identifying Hot Tub Jets
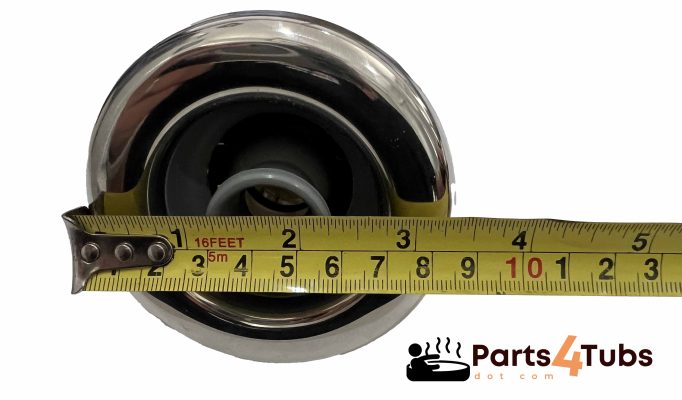
Front Face Measurement
To identify a hot tub jet, begin by measuring the diameter of its front face. Take note of the jet's color and the style of massage it offers. The most common jet styles include directional, rotational, twin rotational, and massage jets.
Should you desire a change, you can replace your existing jet with a different massage style as long as the front face diameter and diffuser type match. However, it's crucial not to interchange jets from different manufacturers - in short, it doesn't work and they don't fit!
For direct replacements, be cautious when dealing with directional and rotational jets, as they can appear identical. The key difference lies in the jet nozzle: rotational jets feature a half-moon shape in the nozzle, while directional jets do not.
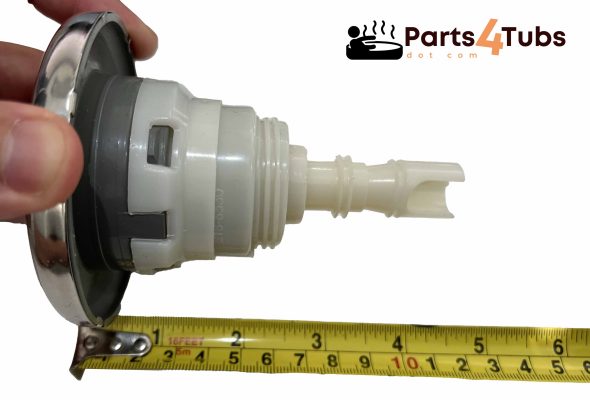
Diffuser Replacement
The rear part of the jet, known as the diffuser, can be replaced separately. Over time, even the most meticulous hot tub users may experience jet pop-outs due to water chemistry issues. This occurs as the locking clips degrade. The solution is to purchase either new jets or jet diffusers.

While replacing diffusers can save you money, it can be a somewhat intricate task. Each brand and manufacturer has a unique design specific to their jet bodies, and diffusers are not interchangeable between different brands.
If you wish to replace a diffuser once identified, you can find compatible options based on the following codes:
- 218-5140: Waterway Cluster Storm (Up to 2")
- 218-6930: Waterway Mini Storm (2"-4")
- 218-4000: Waterway Poly Storm (2"-4")
- 218-6610: Waterway Power Storm (5"+)
Please note jets that start 212 are click in and 229 are thread in.
Rising Dragon also provides identification numbers for their diffusers:
- RD201-3011/12: Push fit, typically 3-1/3" jets
- RD203-3011/12: Threaded fit, typically 3-1/3" jets
- RD203-5011/12: Threaded fit, typically 5" jets
Color and Texture
Hot tub jets come in various colors, including grey, black, white, and stainless steel, sometimes with textured (mottled) or smooth finishes. Stainless steel-rimmed jets are available with grey, black, or white internal plastic components.
Types of Hot Tub Jet
Different Types of Hot Tub Jets:
-
Rotational Jets:
- In rotational jets, a combination of air and water creates a circular motion in the hot tub water, providing a soothing massage experience.
-
Directional Jets:
- Directional jets have a unique feature where the central section of the jet can be adjusted to direct water flow in a specific direction. Typically, these jets feature a single port in the center.
-
Pulsator Jets:
- Pulsator jets are designed with a central section containing at least two openings. When water pressure is applied, this central section rotates, causing the water to alternate between the openings. Some pulsator jets also incorporate a straight bar along the middle of the face, which spins when water pressure is activated.
-
Multi-Massage Jets:
- Multi-massage jets boast a jet face with numerous smaller holes that divide the water into multiple individual streams. This design offers a diverse and invigorating massage experience.
-
Ozone/Cluster Jets:
- Ozone or cluster jets typically lack a visible nozzle, and they are often non-adjustable. They feature an open central section through which water flows, contributing to overall water circulation in the hot tub.
Each type of hot tub jet offers a distinct massage sensation, allowing you to customize your spa experience to your liking.
Sizes
If you can't find any identifiable markings, part numbers, or logos on the jet face, you can attempt to visually determine the brand based on the following measurements. However, be aware that Waterway and CMP jets may look similar but are not interchangeable:
- Waterway Cluster Storm resembles the CMP Typhoon 200 series.
- Waterway Mini Storm resembles the CMP Typhoon 300 series.
- Waterway Poly Storm resembles the CMP Typhoon 400 series.
- Waterway Power Storm resembles the CMP Typhoon 500 series.
Knowing the age of your spa can also aid in identifying the type of jet. Generally, if you purchased your hot tub before 2010, it likely has Waterway jets, while post-2010 models may have different references on the jet.
If no reference is visible due to wear or friction, an opaque white rear jet diffuser typically corresponds to a Waterway jet, whereas a transparent white rear jet diffuser corresponds to a CMP jet.
Feel free to contact me for more information or assistance in identifying your hot tub jets.
Jet Manufacturers
Here are listings of hot tub jets from various manufacturers:
- Waterway Jets
- Pentair Jets
- Rising Dragon Jets
- CMP Jets
Please note that CMP and Waterway diffusers may appear similar, so exercise caution when examining your jets.
Frequently Asked Questions:
-
Are Hot Tub Jets Universally Compatible?
No, hot tub jets are not universally compatible. Compatibility depends on the specific hot tub model. To ensure the right replacement, measure the front face diameter of the jet and identify its part number.
-
What Is the Lifespan of Hot Tub Jets?
The lifespan of a hot tub jet varies based on factors like jet type, quality, usage frequency, water hardness, and environmental conditions. With proper maintenance, these jets can typically last several years.
-
How Much Does Hot Tub Jet Replacement Cost?
The cost of replacing a hot tub jet can vary, depending on the jet type and the source of purchase. Generally, a single jet may cost between $10 to $50, with potential discounts for bulk orders. Labor costs may apply if the installation process is complex.
-
Does More Jets Equal a Better Hot Tub?
The number of jets in a hot tub is important, but it's not the sole indicator of a great hot tub experience. The number of pumps a hot tub has and the variety of jet types it offers are often more significant factors. Consider these aspects when shopping for a home spa to find the ideal model that suits your specific needs.
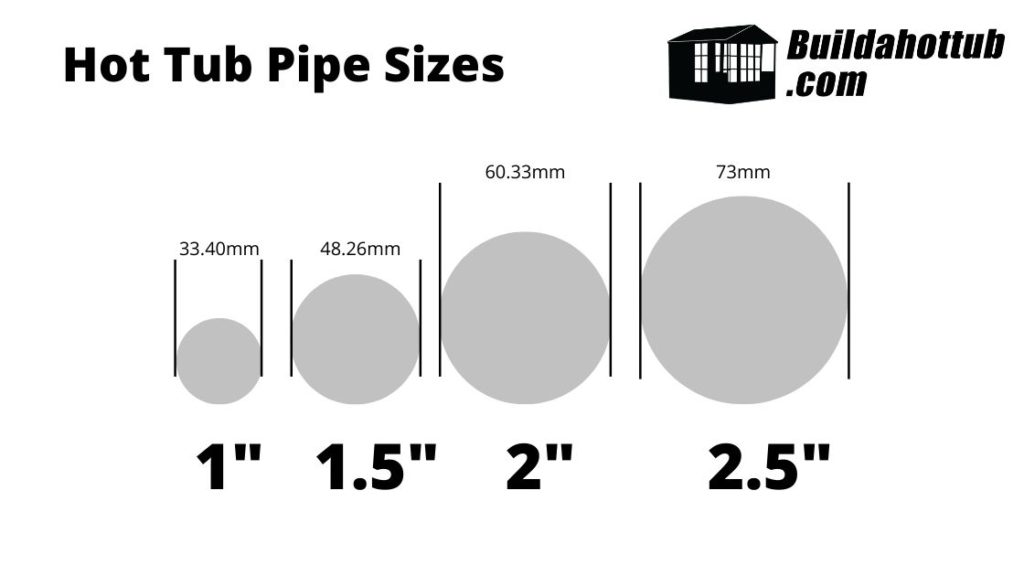
USA Imperial is the Standard
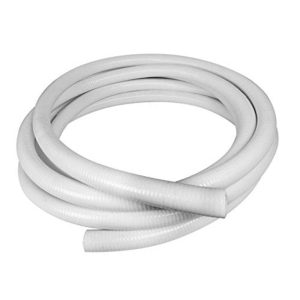
All hot tubs and their fittings are designed for USA standard of Imperial pipe. Would you believe that for example, a European 2.5″ pipe is different from a USA 2.5″ pipe – well it is and there is just over 2mm difference and it makes a huge difference as it doesn’t fit!
You must make sure that you are using American standard sized pipe – always worth checking with your supplier before you purchase.
Can I convert Metric pipe to Imperial?
Yes, you can convert metric pipe to imperial, usually there is a socket connection that will do that. However, what I would preface that with is really, the only reason you would want to do that is say if you have a long run of pipe between your control room and your hot tub. You cant easily get imperial pipe supply but you have found say 75mm pipe that would do the job.
In this instance, it would work to convert it down at each end.
However, what you cannot do (technically you can but it is a real mess to do so) is convert all of the pipework to metric using adaptors. Generally, this just doesn’t work, costs loads in just adaptors alone and the amount of joints means you are going to have some leaks!
What rating of pipe do I need?
Pipe is rated to different pressures. You must use pressure rated pipe on your hot tub build as it is a pressurised system. In general, any pipe that is rated to 130 PSI or 9 BAR can be used on a hot tub build. This is often referred to as Class C. Likewise, Class E which is rated to 15 BAR or 218 PSI is also commonly found on hot tub builds.
Anything less than 130 PSI or 9 BAR should not be used – the pipes are not waste water pipes that are commonly found in hardware stores. They must be pressure rated and you will see this printed on the side of all the pipe so there will be no confusion.
What about Schedule 40 Pipe?
The schedule number on pipe correlates to the thickness of the wall on the pipe: as the number increases, the thicker the wall thickness is. Also, what is interesting is that while the schedule number can be the same on different sized pipes, the actual wall thickness will be different.
However, for our DIY Hot Tubs, we would only opt for schedule 40 – schedule 80 would be an overkill.
We also only use schedule 40 pipe if it is being buried and there is considerable weight on it. What I mean by this is that you need the physical strength of the pipe to stop it being crushed and cracked. In most cases, regular pressure rated pipe is just fine.
Should I use Rigid or Semi-Flexible Pipe?
When I built my own hot tub, I opted for semi-flexible as I though that it would be a little more forgiving. It is, however it is now my experience that the fact it is forgiving, and I use that in a loosest of terms as it is still pretty rigid pipe, it is more likely to leak.
The reason that it is more likely to leak is that you can “force” the joint when there is a little bit of give in the pipe. If you force the joint as I have said many times on this blog and on my YouTube Channel, you are going to have leaks – and it did!
For that reason, wherever possible today I recommend that you use rigid pipe. You have to make a good joint and it has to be accurate. It is forcing your workmanship which you will benefit from in the long run. Rigid pipe is the way forward for your DIY Hot Tub build.
Support your Pipework
If you pick up a length of pipe, 2m/6ft, there is not a lot of weight in it at all. However, if you fill that same pipe with water, cap it off each end and try to lift it, you will notice there is a huge weight increase. Water is heavy. If you have long runs of pipe, you must support them. Whether this is in ground and they should be laid correctly with a gravel base or if it is on your hot tub, they should be tied and pinned to the block work.
If you dont support your pipes and they fill with water, you can put strain on the joints that over time, will work their way loose and leak. It only takes a couple of minutes to tie your pipes and support them and it will save a whole bunch of time and money on repairs in the future by getting this right from the start.
Making the perfect joint with PVC pipe cement.
On this blog and on my YouTube Channel I talk a lot about making the correct joints and that a well made joint doesn’t leak. So, how do you make a well made joint?
- Make sure when you cut the pipes you are cutting them at 90 degrees so they fit into the fittings correctly.
- Make sure you remove any rough edges from your cuts
- Ensure you are roughing up 3″ of the pipe with sand paper before you make the connection
- Apply PVC Pipe Cement to the pipe and the connection
- Twist the pipe or fitting as you are inserting it to prevent “channeling” which leads to leaks
- Make sure the pipe goes all the way into the fitting (always a good idea to mark the ideal depth you want to get to)
- Wipe off any excess pipe cement.
- Allow to cure for 4 hours for full strength
| Part# | 30-3807WHT |
|---|
You may also like…
Air Jets and Jet Parts

Plumbing and Other
Plumbing and Other
Related products

Plumbing and Other
Plumbing and Other

Plumbing and Other
Plumbing and Other
Plumbing and Other
Plumbing and Other