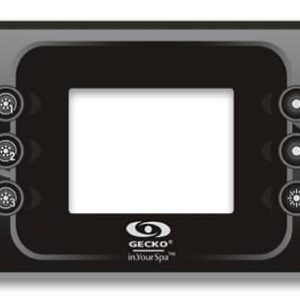
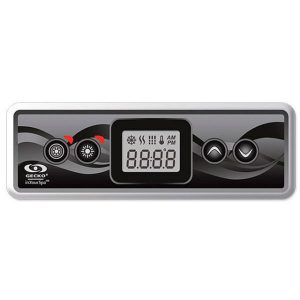
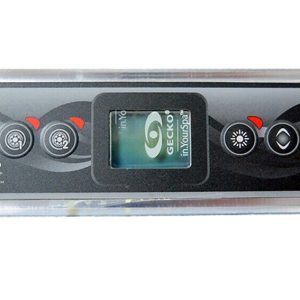
Gecko Overlay IN.K500
£23.95 Inc VAT
11 in stock
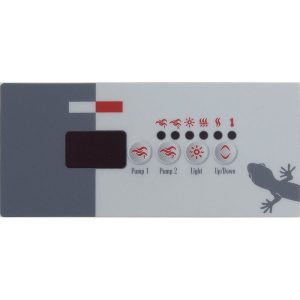
Gecko Overlay IN.K500: Elevate Your Hot Tub Experience
Introduction
As a dedicated hot tub enthusiast and spare parts provider, I’m excited to introduce you to the Gecko Overlay IN.K500. This premium topside control sticker is designed to enhance both the functionality and aesthetics of your hot tub control panel.
Product Overview
The Gecko Overlay IN.K500 is a high-quality replacement overlay that breathes new life into your hot tub’s control interface. Manufactured by Gecko, a renowned name in the industry, this overlay ensures seamless integration with compatible systems.
Key Features
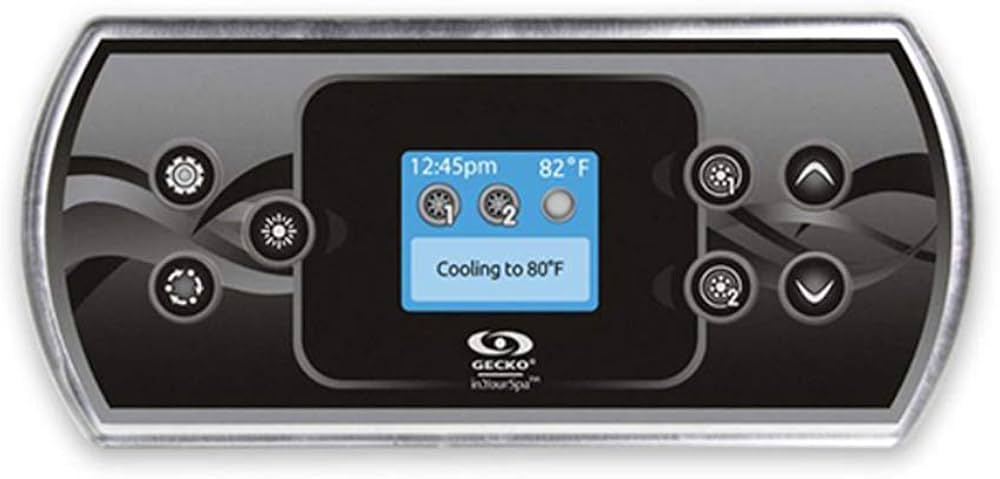
- Intuitive Button Layout: The IN.K500 features 10 clearly labeled buttons, including Settings, Light, Mode, Pump 1, Pump 2, Up, and Down controls.
- Precision Fit: With dimensions of 180mm in length and 85mm in height, this overlay is designed for a perfect fit on compatible control panels.
- Durable Construction: Made to withstand the harsh conditions of hot tub environments, including moisture, heat, and cleaning chemicals.
- Easy Installation: Designed for straightforward application, allowing you to upgrade your control panel quickly and effortlessly.
Why Choose the Gecko Overlay IN.K500?
Enhanced User Experience
The clearly marked buttons and intuitive layout make operating your hot tub a breeze. Whether you’re adjusting the temperature, controlling the pumps, or setting the mood with lighting, everything is just a touch away.
Restored Aesthetics
Over time, hot tub control panels can become worn or faded. The IN.K500 overlay instantly refreshes the look of your control panel, making it appear brand new and adding a touch of sophistication to your spa area.
Compatibility and Quality
As a Gecko product, this overlay is engineered to meet the highest standards of quality and compatibility. It’s designed to work seamlessly with a range of Gecko control systems, ensuring a perfect match for your hot tub.
Installation Tips
Installing the Gecko Overlay IN.K500 is a simple process that can typically be completed in just a few minutes. Here’s a quick guide:
- Ensure the control panel surface is clean and dry.
- Carefully peel off the old overlay, if present.
- Align the new IN.K500 overlay with your control panel.
- Slowly apply the overlay, smoothing out any air bubbles as you go.
- Press firmly around the edges to ensure a secure bond.
Specifications Table
| Specification | Detail |
|---|---|
| Product Type | Topside control sticker/overlay/inlay/decal |
| Manufacturer | Gecko |
| Number of Buttons | 10 |
| Button Functions | Settings, Light, Mode, Pump 1, Pump 2, Up, Down |
| Length | 180mm |
| Height | 85mm |
| Material | Weather-resistant, UV-stable polymer |
| Adhesive Type | High-grade, water-resistant |
Conclusion
The Gecko Overlay IN.K500 is more than just a replacement part; it’s an upgrade for your hot tub experience. With its precise fit, clear labeling, and durable construction, it’s the perfect solution for refreshing your spa’s control panel.
Don’t let a worn-out overlay diminish your hot tub enjoyment. Upgrade to the IN.K500 and rediscover the pleasure of a sleek, functional control panel that enhances your relaxation time.
What is a Hot Tub Keypad Overlay?
A hot tub keypad overlay, also known as a spa control panel overlay, is a protective and decorative component used in hot tubs and spas. It typically consists of a thin, clear or colored piece of material, often made of durable plastic or silicone, that is designed to cover and protect the control panel or keypad of the hot tub.
Here's what a hot tub keypad overlay does:
-
Protection: The overlay acts as a protective barrier for the underlying control panel or keypad. It shields the sensitive electronics and buttons from exposure to water, chemicals, UV rays, and physical damage, such as scratches or abrasions. This helps extend the lifespan of the control panel.
-
Enhancement: Many overlays are designed with labels, graphics, and button outlines that enhance the appearance of the control panel. They often include icons or text that provide clear instructions for operating the hot tub, making it user-friendly, especially for those who may not be familiar with the hot tub's functions.
-
Customization: Hot tub keypad overlays can be customized to match the branding or style of the hot tub manufacturer. They may feature the manufacturer's logo, model name, or specific design elements. Some hot tub owners choose to customize overlays to add a personal touch to their spa.
-
Ease of Cleaning: The overlay is easier to clean and maintain than the underlying control panel. Spills, dirt, or chemical residues that come into contact with the overlay can be wiped away without affecting the control panel's functionality.
-
Replacement: Over time, keypad overlays may wear out or become damaged due to exposure to harsh spa conditions. Fortunately, they are relatively easy and cost-effective to replace when needed, allowing you to refresh the appearance of your hot tub's control panel.
When replacing a hot tub keypad overlay, it's essential to choose one that is compatible with your hot tub's make and model to ensure that the button layout and functions match the original control panel. This compatibility ensures that the overlay fits correctly and accurately represents the hot tub's settings.
In summary, a hot tub keypad overlay serves as a protective, decorative, and informative layer for the control panel, enhancing the user experience and prolonging the life of the hot tub's control system.
How do you replace a hot tub keypad overlay?
Replacing a hot tub keypad overlay is generally a straightforward process that can be done with some basic tools and careful attention. Here's a step-by-step guide on how to replace a hot tub keypad overlay:
Tools and Materials Needed:
- New keypad overlay (ensure it's compatible with your hot tub model)
- Screwdriver (usually a Phillips-head)
- Mild cleaner or rubbing alcohol
- Soft cloth or paper towels
Step-by-Step Instructions:
-
Turn Off Power: Start by turning off the power to your hot tub. This is essential for safety reasons.
-
Access the Control Panel: Depending on your hot tub's design, you may need to remove a cover or panel to access the control panel. Use a screwdriver to remove any screws or fasteners holding the cover in place.
-
Remove the Old Overlay: Carefully peel off the old keypad overlay. Begin at one corner and gently lift it away from the control panel. Take your time and be cautious not to damage the control panel or its components.
-
Clean the Control Panel: After removing the old overlay, use a soft cloth or paper towel and a mild cleaner or rubbing alcohol to clean the control panel's surface. This step ensures that the new overlay adheres properly and looks clean.
-
Prepare the New Overlay: Ensure that the new hot tub keypad overlay is clean and free of any dust or debris. If the new overlay has an adhesive backing, remove the protective film to expose the adhesive.
-
Align and Apply the New Overlay: Carefully align the new overlay with the control panel. Make sure it matches the button layout and design of the control panel. Begin by aligning one corner and gradually press the overlay onto the control panel's surface, working your way across. Smooth out the overlay to prevent air bubbles or wrinkles.
-
Secure the Control Panel Cover: If you had to remove a cover or panel to access the control panel, reattach it using the screws or fasteners you removed earlier.
-
Turn On Power: Once the new overlay is securely in place, and the control panel cover is reattached, turn the power back on at the main circuit breaker.
-
Test the Keypad: Test the keypad buttons to ensure they function correctly. Press each button to verify that it corresponds to the correct function on the hot tub.
-
Final Cleaning: After installation and testing, wipe down the new overlay with a clean, dry cloth to remove any fingerprints or residue.
You've now successfully replaced your hot tub's keypad overlay. Make sure to use a compatible overlay, and exercise caution during the replacement process to avoid damaging the control panel.
| Part# | 9916-101495 |
|---|
Related products
Control Boxes, Spa Packs & Topside Controls
Gecko IN.YT-7 Control Box 4kW – High-Capacity Multi-Pump Spa Control System
Control Boxes, Spa Packs & Topside Controls
Gecko IN.YE-5 Control Box 3kW (V2) – Enhanced Spa Control System
Control Boxes, Spa Packs & Topside Controls
Control Boxes, Spa Packs & Topside Controls
Control Boxes, Spa Packs & Topside Controls
Control Boxes, Spa Packs & Topside Controls

