Aquamite Pump Lid
£58.16 Inc VAT
Out of stock
Want to be notified when this product is back in stock?
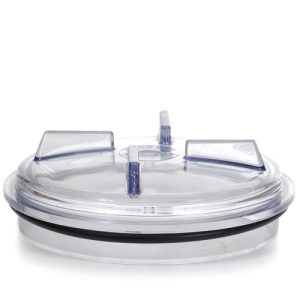
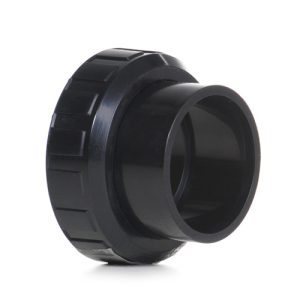
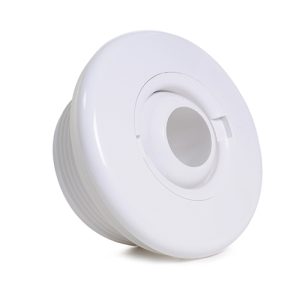
Aquamite Pump Lid
Essential Strainer Cover for Sealed Pump Operation
As a retailer of pool and spa parts, I stock this replacement lid for Aquamite pumps. This transparent or translucent cover seals the strainer basket housing, maintaining the pressure differential necessary for pump operation while allowing visual inspection of basket contents without disassembly.
What is a Pump Lid?
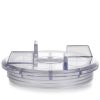
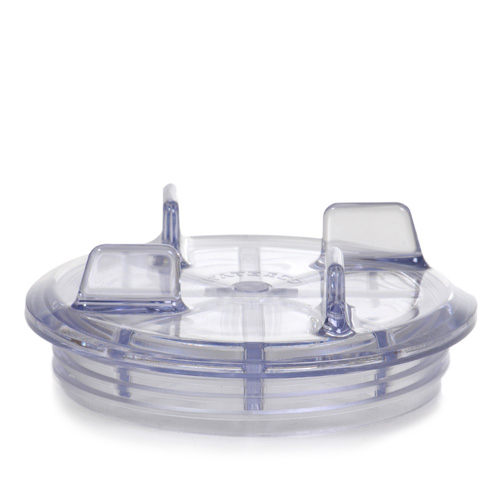
The pump lid (also called a strainer cover or basket lid) is the clear or semi-clear cover that fits over the pump’s strainer basket housing. It threads or clamps into place, creating an airtight seal that’s essential for proper pump operation. The transparent design lets you see the water level and basket condition without removing the lid.
This component must withstand significant pressure from the water flow while maintaining a perfect seal. Even minor air leaks prevent the pump from priming properly, causing performance problems or complete failure to circulate water.
Made from durable clear plastic—typically polycarbonate or acrylic—the lid must resist impact, chemical exposure, temperature variations, and UV degradation while remaining transparent enough for visual monitoring.
Why the Pump Lid is Critical
The lid creates the sealed chamber necessary for the pump to generate suction. Without an airtight seal, atmospheric pressure can’t push water from the pool into the low-pressure area created by the spinning impeller. Air leaks at the lid prevent priming and cause the pump to draw air instead of water.
Visual monitoring through the clear lid allows you to check water level and basket fullness without stopping the pump or breaking the seal. You can see when the basket needs cleaning, verify the pump has primed properly, and spot air bubbles that indicate suction-side leaks elsewhere in the system.
The lid protects the strainer basket area from debris, rain, and foreign objects. Without the lid in place, items could fall into the pump housing, potentially reaching the impeller and causing damage.
For pumps that can handle suction-side pressure testing, the lid must seal perfectly to maintain test pressure. A leaking lid gives false test results and prevents accurate leak detection.
Signs Your Pump Lid Needs Replacement
Visible cracks in the lid body compromise its structural integrity and sealing ability. Even hairline cracks can allow air infiltration or propagate under pressure, leading to sudden failure. Cracks commonly develop around the handle area where stress concentrates.
If the pump struggles to prime or repeatedly loses prime during operation, a failing lid seal is often the culprit. Air entering through a damaged lid or worn O-ring prevents the pump from maintaining the vacuum necessary for water circulation.
Cloudiness or yellowing of the previously clear plastic makes visual inspection difficult. While cosmetic, this opacity defeats one of the lid’s primary purposes—allowing you to see inside without opening the pump.
Warping or distortion prevents the lid from seating properly on the housing. Warped lids can’t compress the O-ring evenly, creating leak paths. This often results from overtightening or exposure to excessive heat.
Stripped threads on threaded lids or broken clamp mechanisms on clamp-style lids prevent secure closure. Without proper tightening, the lid cannot seal adequately, regardless of O-ring condition.
Stress cracks around mounting points indicate material fatigue. These cracks may not penetrate completely at first but will worsen with each pressurization cycle until failure occurs.
Common Causes of Lid Damage
Over-tightening is the leading cause of lid failure. Plastic threads or clamp mechanisms have specific torque limits—exceeding them cracks the lid or strips threads. Hand-tightening until snug, then just slightly more, provides adequate sealing without damage.
Impact damage from dropped tools, stepping on the lid, or accidental strikes cracks the plastic. The lid often sits at shin height where it’s vulnerable to contact during equipment pad work.
UV exposure from direct sunlight degrades plastic, making it brittle and cloudy. Lids on pumps in full sun deteriorate faster than those in shade, becoming prone to cracking and losing transparency.
Chemical exposure from spilled pool chemicals or chlorine gas from nearby feeders accelerates plastic breakdown. Concentrated chemicals are particularly aggressive toward plastic components.
Temperature extremes cause expansion and contraction that stresses the plastic. Rapid temperature changes—like pouring hot water over a cold lid or cold water over a hot lid—can crack the material.
Age and repeated pressurization cycles eventually fatigue the plastic. Each time the pump operates, the lid experiences pressure fluctuations. Over years of service, this cycling degrades the material structure.
Lid Types and Sealing Methods
Threaded lids screw directly into threads molded into the pump housing. They rely on an O-ring compressed by threading action to create the seal. These are simple and reliable but can strip if overtightened.
Clamp-style lids use a separate clamp band or ring that tightens around the lid perimeter, compressing it against the housing. This design distributes pressure more evenly and reduces the risk of overtightening damage.
Some lids feature hand knobs or grips for tool-free removal, while others require a special lid wrench or large strap wrench. The tool-free designs are convenient but their grip areas are stress points prone to cracking.
Regardless of type, all lids depend on a rubber O-ring or gasket to create the actual seal. The lid mechanism simply provides the clamping force to compress this seal. Even a perfect lid won’t seal with a worn O-ring.
Proper Lid Maintenance
Inspect the O-ring every time you remove the lid for basket cleaning. Look for cracks, flat spots, twisting, or debris embedded in the rubber. Replace worn O-rings immediately—they’re inexpensive and critical for sealing.
Clean the O-ring groove in the lid and the mating surface on the housing. Remove any debris, old lubricant buildup, or chemical deposits. Even small particles prevent proper O-ring compression and cause leaks.
Apply a thin coat of silicone-based lubricant to the O-ring before reinstalling the lid. This helps the O-ring slide into place without twisting and improves sealing. Never use petroleum-based products which damage rubber O-rings.
Tighten the lid just until snug—don’t force it. For threaded lids, hand-tighten until you feel resistance, then turn just slightly more. For clamp-style lids, tighten evenly without excessive force. Over-tightening damages both the lid and O-ring.
After reinstalling the lid, check for air leaks before assuming proper sealing. Watch through the clear lid as the pump starts—if you see bubbles entering the strainer, you may need to retighten slightly or check the O-ring positioning.
Installation Tips
Ensure the sealing surfaces are completely clean before installation. Wipe both the O-ring groove and the housing surface with a clean cloth to remove any debris, algae, or chemical residue.
Position the O-ring properly in its groove before installing the lid. The O-ring should sit flat and even, not twisted or bunched. A twisted O-ring creates an immediate leak path.
For threaded lids, start threading by hand to ensure proper alignment. Cross-threading causes immediate damage that may not be repairable. If the lid doesn’t thread smoothly, back it out and restart.
Don’t reuse old O-rings if you have a new one available. Once compressed, O-rings develop a “memory” of their compressed shape and may not seal as effectively when reinstalled.
After installation, fill the pump basket with water before starting the pump. This helps priming and lets you watch through the clear lid as the pump draws water, confirming proper operation.
Compatibility
This replacement lid is specifically designed for Aquamite pump models. The diameter, thread pattern (or clamp design), and sealing surface match these pumps’ housing specifications. Using the correct lid ensures proper fit, reliable sealing, and long-term performance.
Aquamite pumps are widely used in residential installations, making replacement lids regularly needed components when damage occurs or during pump rebuilds.
Product Specifications
| Specification | Details |
|---|---|
| Product Type | Pump Strainer Lid / Cover |
| Compatibility | Aquamite pumps (various models) |
| Function | Seals strainer housing; allows visual inspection |
| Material | Clear chemical-resistant plastic (polycarbonate/acrylic) |
| Features | Transparent for visual monitoring |
| Sealing Method | O-ring seal (O-ring sold separately) |
| Application | Covers pump basket housing |
| Weight | 0.07 kg |
| Dimensions (L × W × H) | 0.1 m × 0.15 m × 0.15 m |
| Volume | 0.002 cubic meters |
| SKU | 6497240044 |
| Category | Pool & Spa Spares |
Best Practices
Never over-tighten the lid. This single practice prevents most lid damage. If you hear cracking sounds during tightening, stop immediately—you’ve already caused damage.
Keep a spare lid on hand for emergencies. A cracked lid during peak swimming season leaves your pool without circulation until replacement arrives. Having a spare eliminates this downtime.
Protect outdoor pumps from direct sunlight when possible. Simple pump covers or shade structures extend the life of plastic components including the clear lid.
Replace the lid O-ring annually or whenever it shows wear. This preventive maintenance is far less expensive than dealing with air lock problems or replacing a lid that cracked during struggles with a failing O-ring seal.
During winter storage or extended shutdown periods, loosen the lid slightly to relieve pressure on the O-ring. This prevents permanent compression set that reduces sealing effectiveness.
Mark your calendar to inspect the lid periodically during the season. Catching developing cracks early allows planned replacement rather than emergency repairs when the lid fails unexpectedly.
This essential component maintains the sealed system necessary for pump operation while providing the visual access that simplifies maintenance and troubleshooting throughout the swimming season.
| Weight | 0.07 Kilograms |
|---|---|
| Length | 0.1 Meters |
| Width | 0.15 Meters |
| Height | 0.15 Meters |
| Volume | 0.002 CubicMeters |
| Supplier | GoldenC |
Related products
Spares