FLIK2CL | C2 installation kit for concrete, tile or liner pools
£509.34 Inc VAT
C2 Rondo Counter-Current System Installation Kit
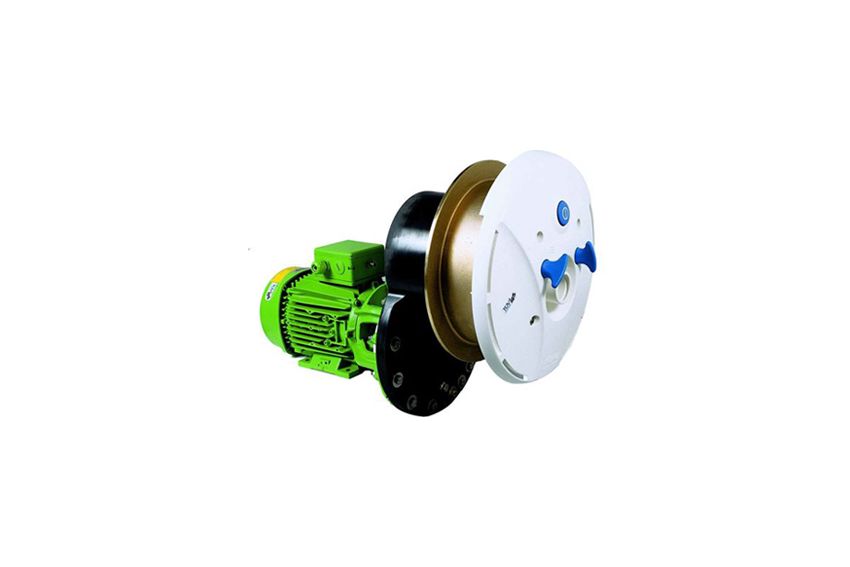
**Please not the image is of the complete C2 Rondo Counter Current System, this is comprosed of the Installation Kit, Separate Faceplate and Seprate Motor – there are 3 separate parts that need to be ordered for this product.**
Transform your private pool into a dynamic swimming experience with the premium C2 Rondo counter-current system from Schmalenberger.
The Complete Installation Solution
Our specialized installation kits are designed for perfect integration with your specific pool type:
- Concrete-tile pool kit
- Concrete-liner pool kit
Each kit includes precisely engineered components that ensure watertight seals, proper alignment, and professional finish that seamlessly blends with your pool’s aesthetic.
Professional-Grade Components
The C2 Rondo counter-current system has been meticulously engineered with state-of-the-art technology and has passed rigorous TÜV testing with the TÜV-GS safety standard mark. Our installation kits include:
- Precisely machined mounting rings and gaskets
- Pool-specific housing units
- All necessary mounting hardware
- Comprehensive installation instructions
Performance You Can Feel
Once installed, the C2 Rondo delivers:
- Powerful water flow (48-60 m³/h depending on model)
- Adjustable jet direction and intensity
- Optional air-mixing for bubble bath effect
- Compatible with massage attachments
- Near-silent operation
Choose the Right Kit for Your Pool
Concrete Pool Owners: Our concrete pool kits include specialized housing that integrates directly into your pool wall during construction, creating a permanent, leak-free installation.
Liner Pool Owners: Special clamp rings and gaskets ensure a watertight seal that protects your liner while providing strong mounting for the counter-current system.
Pre-fabricated Pool Owners: Our quick-mount system adapts perfectly to pre-fabricated pools with reinforced mounting rings that distribute pressure evenly.
Wooden Pool Owners: Specialized brackets and mounting systems designed specifically for wooden pool structures ensure proper support and watertight installation.
Easy Installation Process
While professional installation is recommended, our comprehensive manual guides you through every step of the process with clear diagrams and instructions. The C2 Rondo system is designed for straightforward installation with your chosen kit.
Order Your Kit Today
Contact your authorized Fluvo dealer to order the correct installation kit for your pool type. With the proper installation kit, you’ll enjoy years of counter-current swimming pleasure from your C2 Rondo system.
Installation Process for Concrete Pool
- Plan the pump pit first with:
- Clear dimensions of at least 600 x 600 x 600 mm
- Return connection at least 300 mm below the pool water level
- Adequate leakage water drainage (min. DN 40)
- Cooling air supply for the motor (min. 2x DN 125)
- Ensure the non-return air valve and switchgear cabinet are positioned above the pool water level
- Installation preparations:
- Place the installation kit on the formwork board and transfer the bore holes
- Drill the holes into the pool-side formwork board
- Securely attach the installation kit with the mounting protection film to the pool-side formwork board
- After removing the shuttering, take off the polystyrene filler piece and protection film
- Pump kit installation:
- Mount the suction housing with the clamp gasket and nuts/washers on the installation kit
- Ensure the suction housing is mounted with the membrane switch connection at the top
- The sealing contact faces must be clean and smooth
- Face plate assembly installation:
- Drain the pool water if already filled to below the installation kit
- Connect the air button by placing the hose with the hose coupling onto the plug sleeve on the face plate assembly
- Remove any mounting protection film
- Put the face plate assembly onto the installation kit, allowing the pressure and air connections to slide into one another
- Fasten to the installation kit with the screws
- Ensure the switching tube has no kinks, lay it in a loop, and do not shorten it
- Electrical connections:
- Must be carried out by a qualified electrician
- Follow local regulations and safety standards
- Use an earth leakage circuit breaker (nominal fault current ≤ 30 mA)
- Ensure a fixed connection and proper grounding
- Connect the motor according to the circuit diagrams provided for your specific model
- Final notes:
- Never run the pump without water as it will damage the mechanical seal
- The counter-current unit complies with protection class I
- The installation must be below water level as the pump is not self-priming


