

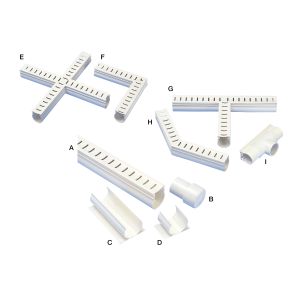
DR4319P | Drainage channel nailing clip (D)
£2.07 Inc VAT
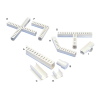
DR4319P | Drainage Channel Nailing Clip (D)
The Essential Securing Component for Professional Drainage Installation
While drainage channels, angle pieces, and junction fittings understandably get most of the attention when planning a pool or spa drainage system, there’s a humble yet absolutely critical component that makes professional installation possible: the nailing clip. The DR4319P Drainage Channel Nailing Clip (Type D) is the unsung hero that keeps your entire drainage system properly positioned and securely anchored during installation, ensuring that your carefully planned drainage layout remains exactly where you need it throughout the concrete pour and beyond.
What is a Drainage Channel Nailing Clip?
As a retailer of hot tub spare parts, I’ve learned that successful installations come down to proper attention to every detail—including the seemingly minor components. A nailing clip is a specialized fastening device designed to attach securely to the bottom or sides of drainage channel sections, allowing you to anchor the channel firmly in place during installation.
These snap-on clips serve as the crucial link between your drainage channel and the wooden stakes or rebar framework that holds everything in position while concrete is poured around the system. Without proper nailing clips, even the most carefully laid out drainage system can shift, tilt, or move out of alignment during installation, compromising the entire project.
Understanding the Role of Nailing Clips
Think of nailing clips as the temporary scaffolding that supports your drainage system during its most vulnerable period—the installation phase. Here’s why they’re essential:
During Installation
- Maintain precise alignment: Keep drainage channels perfectly straight and level as specified in your layout
- Prevent movement: Hold channels firmly in position during concrete placement and finishing
- Ensure consistent depth: Maintain the proper elevation so channel tops sit at the correct height relative to finished surfaces
- Allow adjustment: Enable fine-tuning of channel position before permanent installation
The Installation Process
Professional drainage installation typically follows this sequence:
- Grade the subsoil sloping toward drain locations
- Drive stakes into the ground along the planned drainage path (typically spaced about 30 inches apart)
- Attach nailing clips to the drainage channel sections
- Place channels over stakes using the clips as secure attachment points
- Nail firmly to stakes after careful alignment
- Pour and finish concrete with channels held securely in place
- Remove stakes after concrete sets, leaving channels permanently embedded
The nailing clips make steps 3-5 possible, providing the attachment mechanism that keeps everything stable and properly positioned.
Key Features and Benefits
Snap-On Design
The Type D configuration features a snap-on design that attaches securely to drainage channel sections without requiring special tools or complex installation procedures. This quick-attach mechanism saves installation time while ensuring reliable holding power.
Secure Stake Attachment
Once clipped to the drainage channel, the nailing clip provides a solid surface for nailing to wooden stakes or wire-tying to rebar supports. This secure attachment prevents channel movement during the critical concrete pour phase when displacement would be disastrous.
Proper Spacing
Drainage channels require multiple support points to maintain alignment over their length. Nailing clips are typically used at regular intervals—commonly three clips per three-meter section or two clips per ten-foot section—providing adequate support without excessive hardware.
Durable Construction
Made from rigid PVC material, nailing clips withstand the rigors of installation including hammer strikes, concrete contact, and the stresses of supporting drainage channels during the pour. They remain secure throughout the installation process, releasing only when stakes are removed after concrete has set.
Installation Guidelines and Best Practices
Determining Clip Quantity
The number of nailing clips required depends on your drainage channel length:
- Standard recommendation: Three clips per three-meter (approximately 10-foot) section
- Heavy-duty applications: More clips may be needed for deeper pours or challenging site conditions
- Corner and angle sections: Additional clips near fittings ensure these critical areas remain properly positioned
For complete installations, calculate your total channel length and multiply by the clips-per-section ratio to determine your requirements. Always order extra clips to allow for adjustments and potential replacements during installation.
Spacing Considerations
Proper clip spacing ensures consistent support along the entire channel length:
- Drive stakes approximately 30 inches apart along the planned drainage path
- Attach clips to channels at corresponding intervals to match stake positions
- Ensure end sections have adequate support by positioning clips appropriately near channel ends and junction points
- Additional clips may be needed at angle pieces, tee junctions, or other fittings where extra stability is beneficial
Installation Sequence
Follow this professional installation approach:
- Prepare the site: Grade subsoil with appropriate slope toward drainage outlets
- Set stake lines: Drive stakes along the planned channel path at proper spacing and depth
- Attach clips to channels: Snap nailing clips onto channel sections at intervals matching stake positions
- Position channels: Place channel sections over stakes with clips aligned for attachment
- Connect sections: Use couplers to join channel sections ensuring straight, continuous runs
- Secure to stakes: Nail clips firmly to stakes after careful alignment verification
- Final adjustment: Make any necessary fine adjustments to ensure proper elevation and alignment
- Pour concrete: Place and finish concrete around secured channels
- Remove stakes: After concrete has adequately cured, remove stakes leaving channels permanently in place
Why Nailing Clips Matter
In my experience supplying drainage components, I’ve heard countless stories of installations gone wrong when proper securing methods weren’t used:
Without Adequate Clips
- Channels shift during concrete placement, moving out of alignment and creating uneven drainage
- Improper elevation results when channels aren’t held at consistent depth throughout
- Angular deviations occur particularly at joints and fittings where support is insufficient
- Time and cost overruns result from having to correct positioning problems during installation
With Proper Clip Installation
- Channels remain precisely positioned throughout the entire concrete pour
- Consistent depth is maintained ensuring proper integration with finished surfaces
- Joints stay aligned with adjacent sections properly connected and positioned
- Installation proceeds efficiently without constant adjustment and repositioning
The relatively small investment in adequate nailing clips pays substantial dividends in installation quality and efficiency.
Professional Installation Tips
Stake Selection and Preparation
The effectiveness of nailing clips depends on proper stake selection:
- Use stakes of adequate size: Typically 3.5-inch wide wooden stakes driven deep enough for stability
- Ensure stakes are plumb: Vertical stakes provide the best support and make alignment easier
- Space consistently: Maintain regular spacing to ensure even support along channel length
- Drive to proper depth: Stakes must be secure enough to resist movement during nailing and concrete pour
Alignment Verification
Before final securing and concrete pour:
- Use string lines: Establish reference lines to ensure channels follow planned paths precisely
- Check elevations: Verify that channel tops sit at the correct depth below planned finished surface
- Confirm slopes: Ensure proper drainage slope is maintained throughout the system
- Inspect joints: Verify that couplers, angle pieces, and other fittings are properly aligned and secured
Concrete Placement Considerations
During the concrete pour:
- Protect channel tops: Keep protective tape in place to prevent concrete intrusion into drainage channels
- Monitor alignment: Watch for any channel movement during concrete placement and make immediate corrections if needed
- Proper finishing: Trowel concrete to create gradual slopes toward drainage channels for optimal water collection
- Avoid direct impact: Don’t drop concrete directly onto channels; place and spread carefully to prevent displacement
Technical Specifications
| Specification | Detail |
|---|---|
| Product Code | DR4319P |
| Product Type | Drainage Channel Nailing Clip |
| Variant | Type D |
| Category | Overflow Grating & Drainage Channel |
| Primary Function | Secure drainage channels to stakes during installation |
| Design Type | Snap-on attachment to drainage channels |
| Application | Pool deck drainage installation, spa surrounds, patio drainage |
| Installation Method | Clips attach to channels, then nail to wooden stakes or wire-tie to rebar |
| Material | Rigid PVC construction |
| Typical Spacing | Three clips per three-meter section (approximately 10 feet) |
| Stake Spacing | Typically 30 inches apart along drainage path |
| Key Benefits | Maintains alignment, prevents movement, ensures consistent depth |
| Compatibility | Standard drainage channel systems |
| Usage Stage | Installation phase—channels are permanently embedded after concrete curing |
Cost-Effective Quality Assurance
When you consider that a professional drainage installation represents a significant investment in materials, labor, and long-term pool integrity, the cost of proper nailing clips is negligible. Yet their impact on installation success is profound. Think of nailing clips as inexpensive insurance that protects your much larger investment in drainage channels, fittings, and installation labor.
A few pounds spent on adequate clips can prevent problems that cost hundreds or thousands to rectify:
- Misaligned channels that don’t collect water properly
- Uneven elevations creating standing water or unsightly inconsistencies
- Failed joints where sections moved independently during installation
- Complete reinstallation in worst-case scenarios where positioning errors are severe
Ordering Considerations
When planning your drainage installation, calculate nailing clip requirements as part of your complete materials list:
- Measure total drainage channel length for your installation
- Calculate clips needed: Multiply channel length by the recommended clips-per-section ratio
- Add extras for fittings: Include additional clips for angle pieces, tee junctions, and cross pieces
- Order surplus: Purchase 10-20% extra clips to allow for installation adjustments or replacements
- Verify compatibility: Ensure clips are designed for your specific drainage channel system
Having adequate clips on hand before installation begins prevents costly delays and ensures you can complete the installation properly in one continuous operation.
Professional Results Through Proper Details
The DR4319P Drainage Channel Nailing Clip represents the kind of attention to detail that separates professional installations from amateur attempts. While it might be tempting to improvise securing methods or skip proper anchoring to save a few pounds, the consequences of improperly secured channels can haunt you for the life of the pool.
Professional pool builders and experienced installers know that every component matters—from the primary drainage channels down to the humble nailing clips that hold everything in place. Using the correct clips in adequate quantities, properly spaced and securely attached, ensures your drainage system installation proceeds smoothly and results in a system that performs flawlessly for decades.
Note: Always follow manufacturer installation guidelines and industry best practices when installing drainage systems. Proper securing during installation is critical to achieving professional results and long-term system performance.
Related products
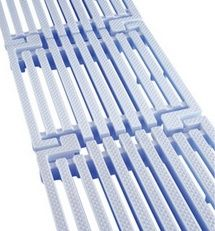
Overflow Grating & Drainage Channel

Overflow Grating & Drainage Channel
HD106200-S1N | Overflow grating 200mm wide x 20mm, single spine
Overflow Grating & Drainage Channel
HD106250-S1N | Overflow grating 250mm wide x 20mm, single spine
Overflow Grating & Drainage Channel
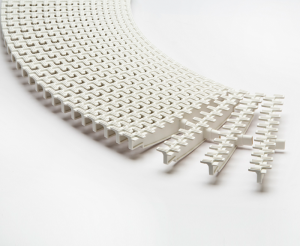
HD106200-S2N | Overflow grating 200mm wide x 20mm, double spine

Overflow Grating & Drainage Channel
HD106250-S2N | Overflow grating 250mm wide x 20mm, double spine
Overflow Grating & Drainage Channel
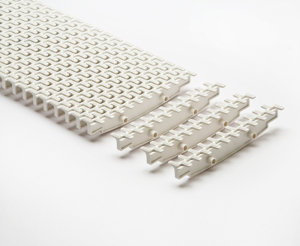
Overflow Grating & Drainage Channel
Overflow Grating & Drainage Channel